MS Prompt flow
Prompt flow is a development tool designed to streamline the creation of LLM applications. It does so by providing tooling that simplifies the process of prototyping, experimenting, iterating, and deploying LLM applications.
Most notably, Prompt flow allows you to author chains of native and prompts and visualize them as a graph. This allows you and the rest of your team to easily create and test AI powered capabilities in both Azure Machine Learning Studio and locally with VS Code.
With Azure Machine Learning prompt flow, you can:
- Create executable flows that link LLMs, prompts, and Python tools through a visualized graph.
- Debug, share, and iterate your flows with ease through team collaboration.
- Create prompt variants and evaluate their performance through large-scale testing and A/B testing.
- Deploy a real-time endpoint that unlocks the full power of LLMs for your application.
Prompt Flow can also be used together with the LangChain python library, which is the framework for developing applications powered by LLMs, agents and dependency tools. In this document, we'll show you how to supercharge your LangChain development on our prompt Flow.
Ideal Prompt flow process
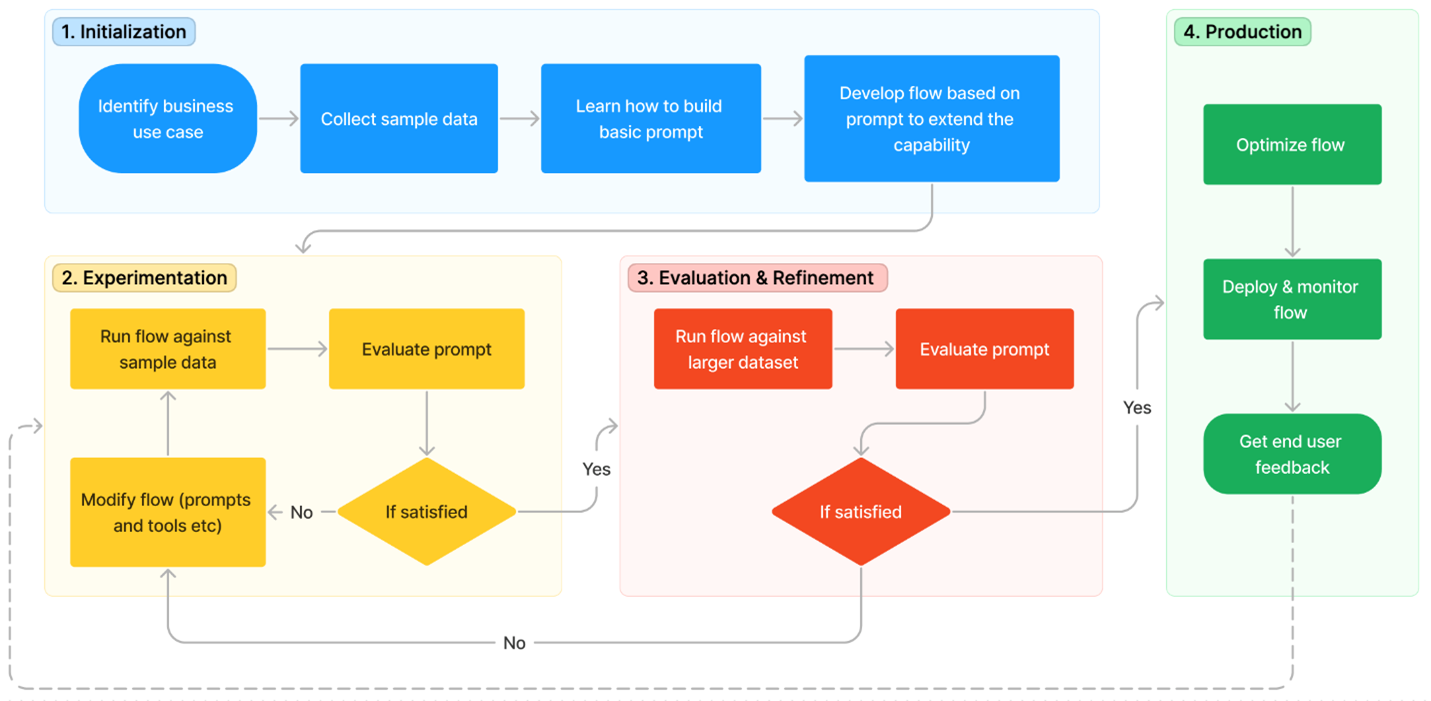
The lifecycle consists of the following stages:
-
Initialization: Identify the business use case, collect sample data, learn to build a basic prompt, and develop a flow that extends its capabilities.
-
Experimentation: Run the flow against sample data, evaluate the prompt's performance, and iterate on the flow if necessary. Continuously experiment until satisfied with the results.
-
Evaluation & Refinement: Assess the flow's performance by running it against a larger dataset, evaluate the prompt's effectiveness, and refine as needed. Proceed to the next stage if the results meet the desired criteria.
-
Production: Optimize the flow for efficiency and effectiveness, deploy it, monitor performance in a production environment, and gather usage data and feedback. Use this information to improve the flow and contribute to earlier stages for further iterations.
Creating a simple app
1. Set up connection ...
Prompt flow provides various prebuilt connections, including Azure OpenAI, OpenAI, and Azure Content Safety. These prebuilt connections enable seamless integration with these resources within the built-in tools and helps securely store and manage secret keys or other sensitive credentials required for interacting with LLM (Large Language Models) and other external tools.
... with OpenAI
Create an OpenAI key
- Connect to your Openai account and go to the API keys section
- Click Create a new secret key and save it for later
Create the connection
- Connect to https://ml.azure.com
- Create a workspace, select it and enter the Prompt flow section
- Select one of the provided connection (OpenAI in this case)
- Then provide the connection name, API key (copied earlier) and click Save
... with Azure-OpenAI
Create an Azure OpenAI service
- Connect to Azure portal and go to the Azure OpenAI service
- Click the Create Azure OpenAI button, fill the required fields and deploy it
Create an Azure OpenAI Chat instance
- Connect the chat playground
- Click Create a new deployement
- Select a model, give it a name and create the ressource
Create the connection
- Connect to https://ml.azure.com
- Create a workspace, select it and enter the Prompt flow section
- Select one of the provided connection (Azure OpenAI in this case)
- Then a right-hand panel will appear. Select the subscription and resource name, provide the connection name, API key, API base, API type, and API version (open the chat playground and click View code on the selected chat-instance) before selecting the Save button
2. Create and develop your prompt flow
- In Flows tab of Prompt flow home page, select Create to create your first prompt flow. You can both create a flow from a root template (by type) or by cloning one of the samples in the gallery (which is the approach we will use here)
- Clone of of the provided template (e.g. Web Classification) and then you'll enter the flow authoring page
- Click Select runtime (top right) and Select with advanced settings in order to chose a running instance type (you will see the characteristics and the price) or simply use Start if you want to use the default instance setting
⚠️ Be careful, the runtime is not free... it adds up with the LLM model calls (and the deployment entrypoint if any).
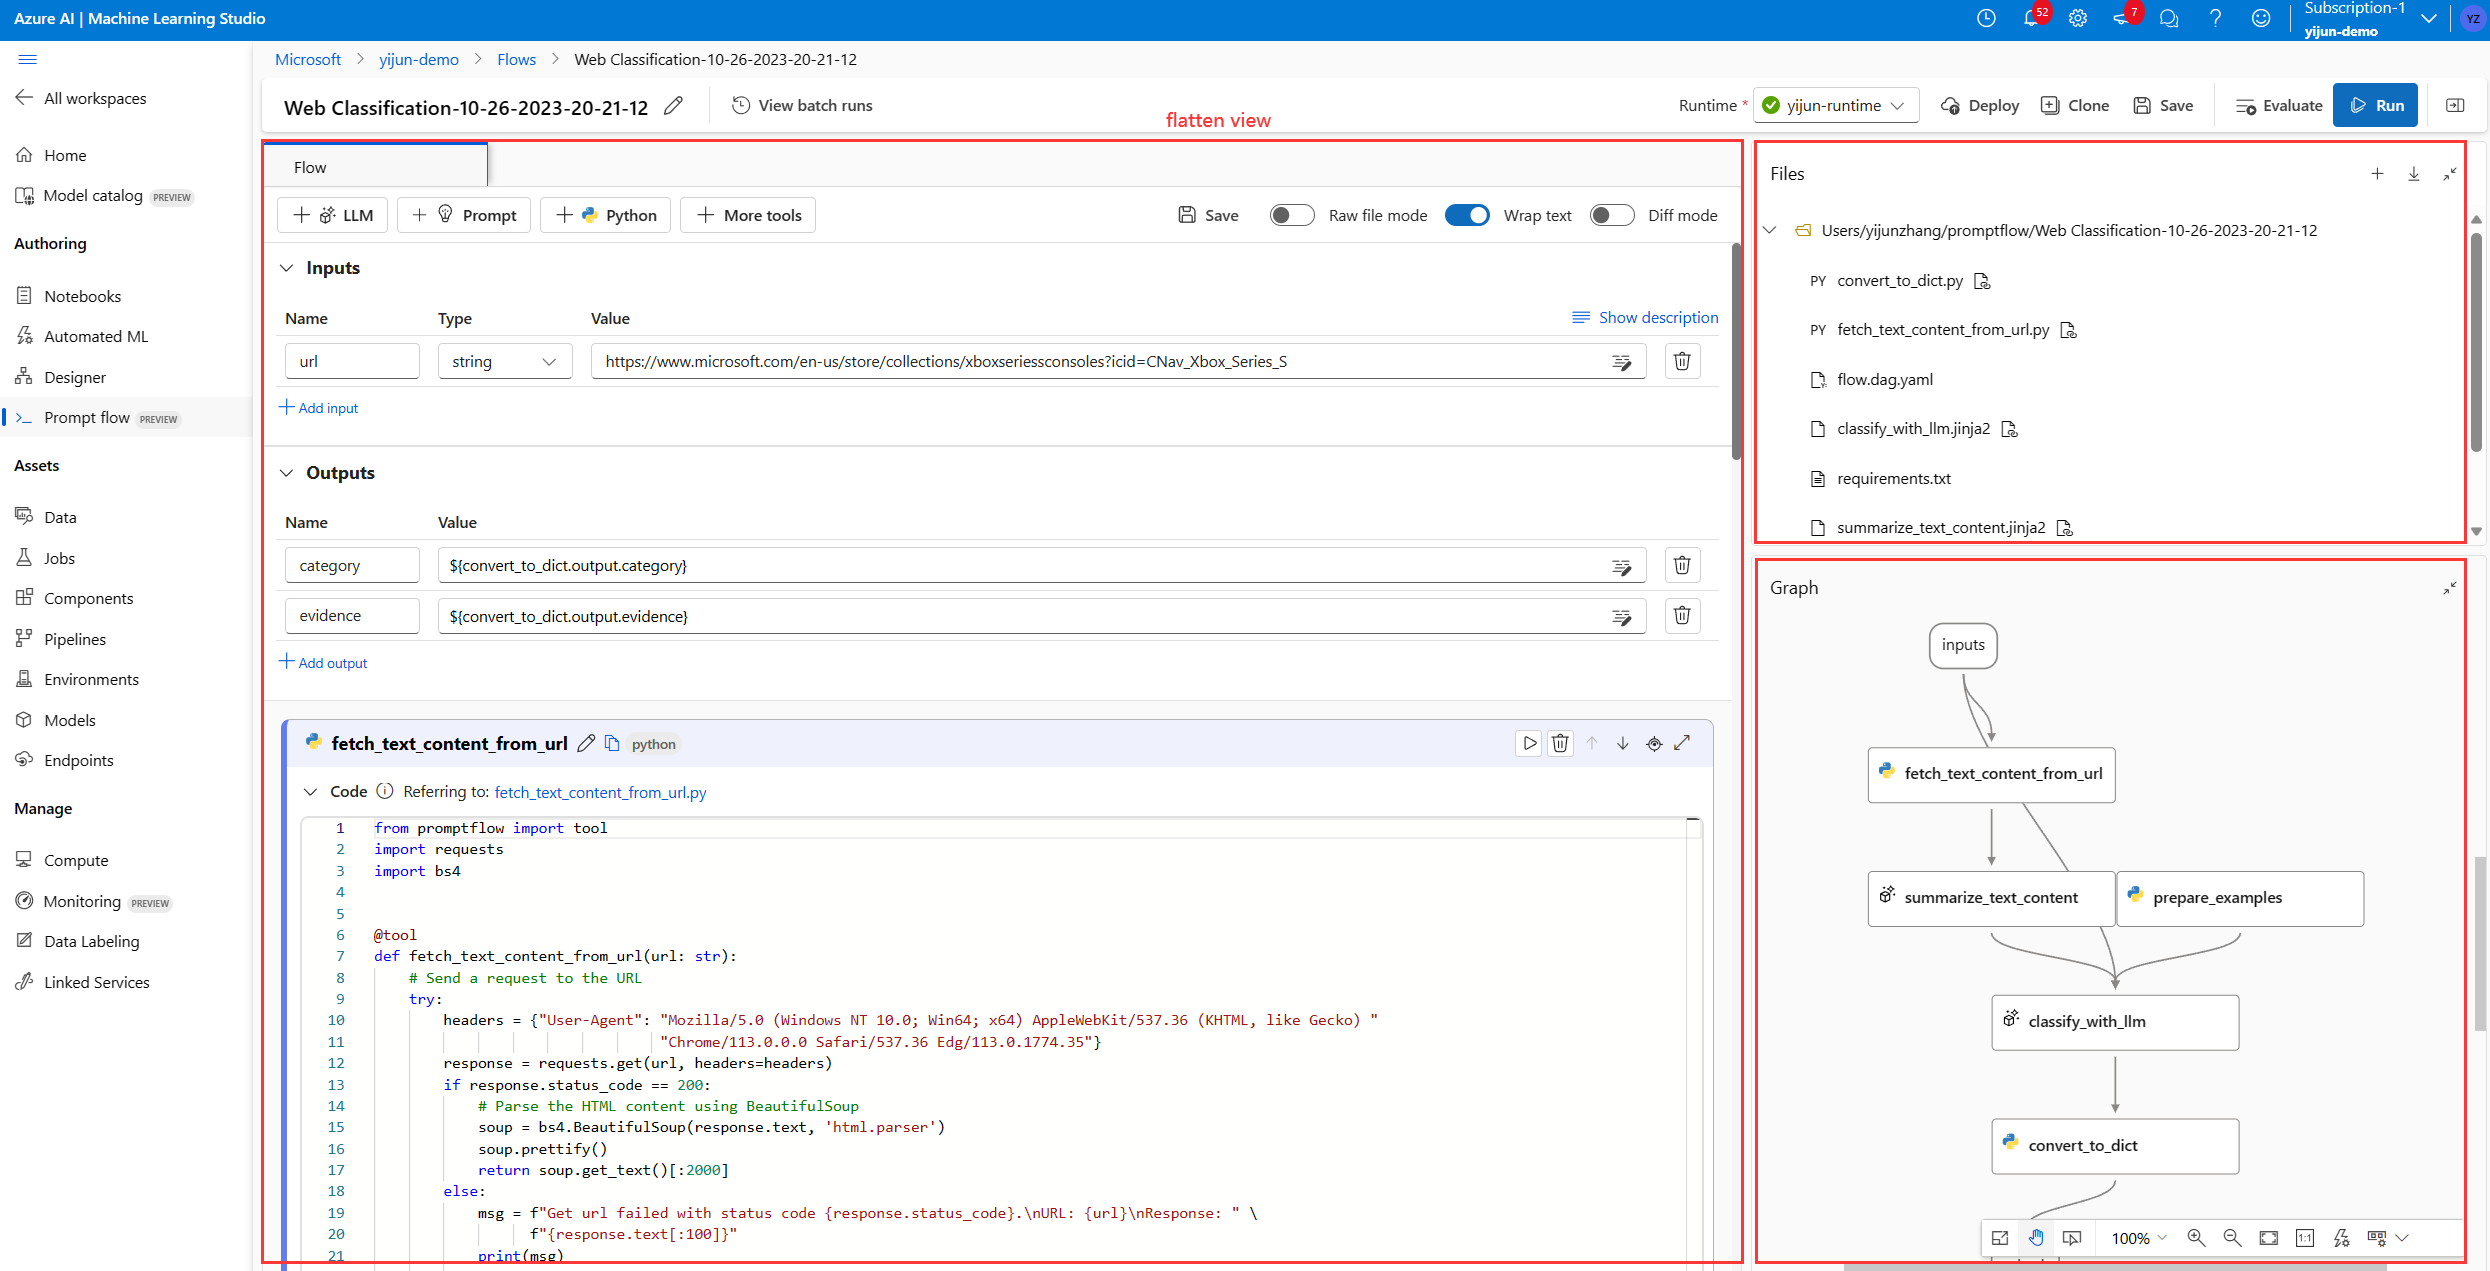
At the left of authoring page, it's the main working area where you can author the flow, for example add a new node, edit the prompt, select the flow input data, etc.
The top right corner shows the folder structure of the flow. Each flow has a folder that contains a flow.dag.yaml file, source code files, and system folders. You can export or import a flow easily for testing, deployment, or collaborative purposes.
In the bottom right corner, it's the graph view for visualization only. You can zoom in, zoom out, auto layout, etc.
- Set up LLM nodes: for each LLM node, you need to select a connection to set your LLM API keys.
- Run single nodes: To test and debug a single node, select the Run icon on node in flatten view. Run status is shown at the very top, once running completed, check output in node output section.
- Run the whole flow: To test and debug the whole flow, select the Run button at the right top (you can change the flow inputs to test how the flow behaves differently)
3. Test and evaluation
After the flow run successfully with a single row of data, you might want to test if it performs well in large set of data, you can run a bulk test and choose some evaluation methods then check the metrics.
Evaluate
- Select Evaluate button next to Run button, then a right panel pops up. It's a wizard that guides you to submit a batch run and to select the evaluation method (optional).
- You need to set a batch run name, description, select a runtime, then select Add new data to upload the data you just downloaded (it supports csv, tsv, and jsonl file for now).
- Setup the input mapping if needed. It supports mapping your flow input to a specific data column in your dataset, which means that you can use any column as the input, even if the column names don't match.
- Select one or multiple evaluation methods (e.g. use a Classification Accuracy Evaluation to evaluate a classification scenario etc.). The evaluation methods are also flows that use Python or LLM etc., to calculate metrics like accuracy, relevance score
- Map the correct column of the evaluation dataset to the
groundtruthparameter and the appropriate flow output parameter to thepreddictionparameter - Select Review + submit to submit a batch run and the selected evaluation
Check results
- Select View batch run to navigate to the batch run list of this flow
- Click View latest batch run outputs (or View batch run if you want to see the number of tokens used)
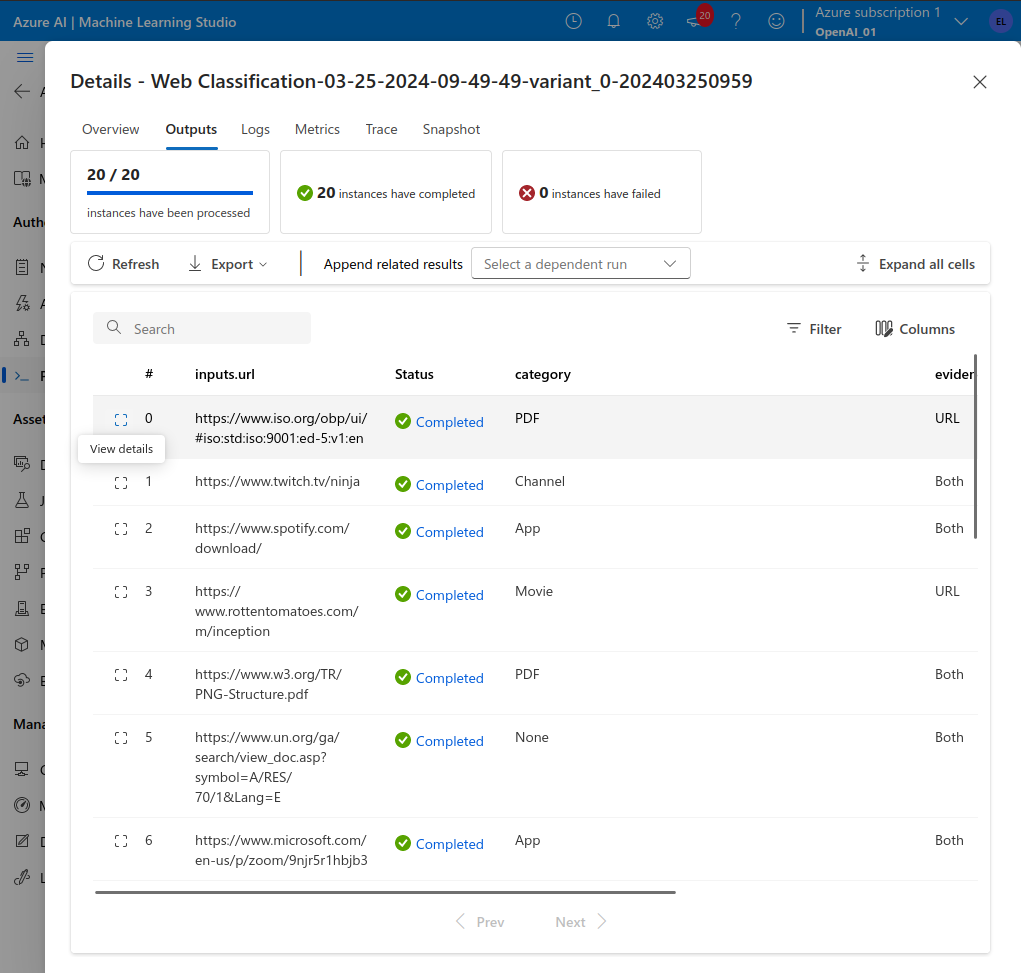
- Click Metrics to see the results of the selected metrics

- Select Export to download the output table for further investigation
4. Deployment
After you build a flow and test it properly, you might want to deploy it as an endpoint so that you can invoke the endpoint for real-time inference.
Configure the endpoint
- (Optional) To deploy a given version, select a batch run link in the View batch runs
- Select Deploy (top left). A wizard pops up to allow you to configure the endpoint.
- Specify an endpoint and deployment name, select a virtual machine, set connections, do some settings (you can use the default settings)
- Select Review + create to start the deployment
Test the endpoint
It takes several minutes to deploy the endpoint.
- Click Assets / Endpoints and select the Real-time endpoints tab
- Click your endpoint-name and check the Endpoint attributes (left) and the Deployment attributes (bottom right). Wait until the both provisioning states are
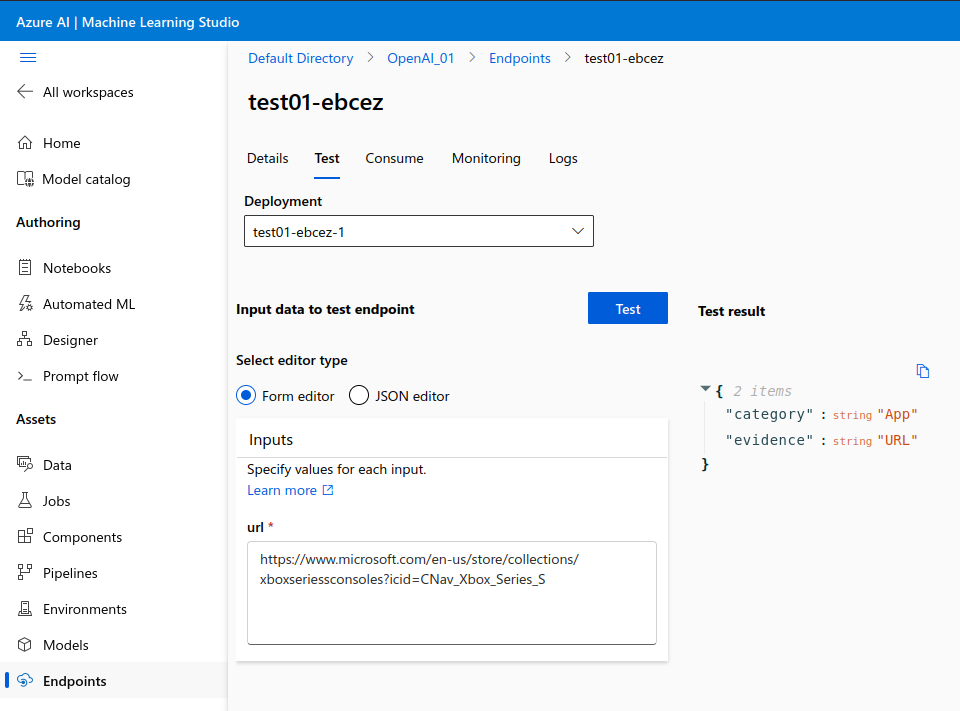
Succeeded - Click the Test button that appeared next to the Details button
- Put the test inputs in the input box, and select Test
- Then you'll see the result predicted by your endpoint
5. Clean up ressources
Stop compute instance
If you're not going to use it now, stop the compute instance:
- In the studio, in the left navigation area, select Compute
- In the top tabs, select Compute instances
- Select the compute instance in the list
- On the top toolbar, select Stop

Delete endpoint
If you don't need the endpoint anymore:
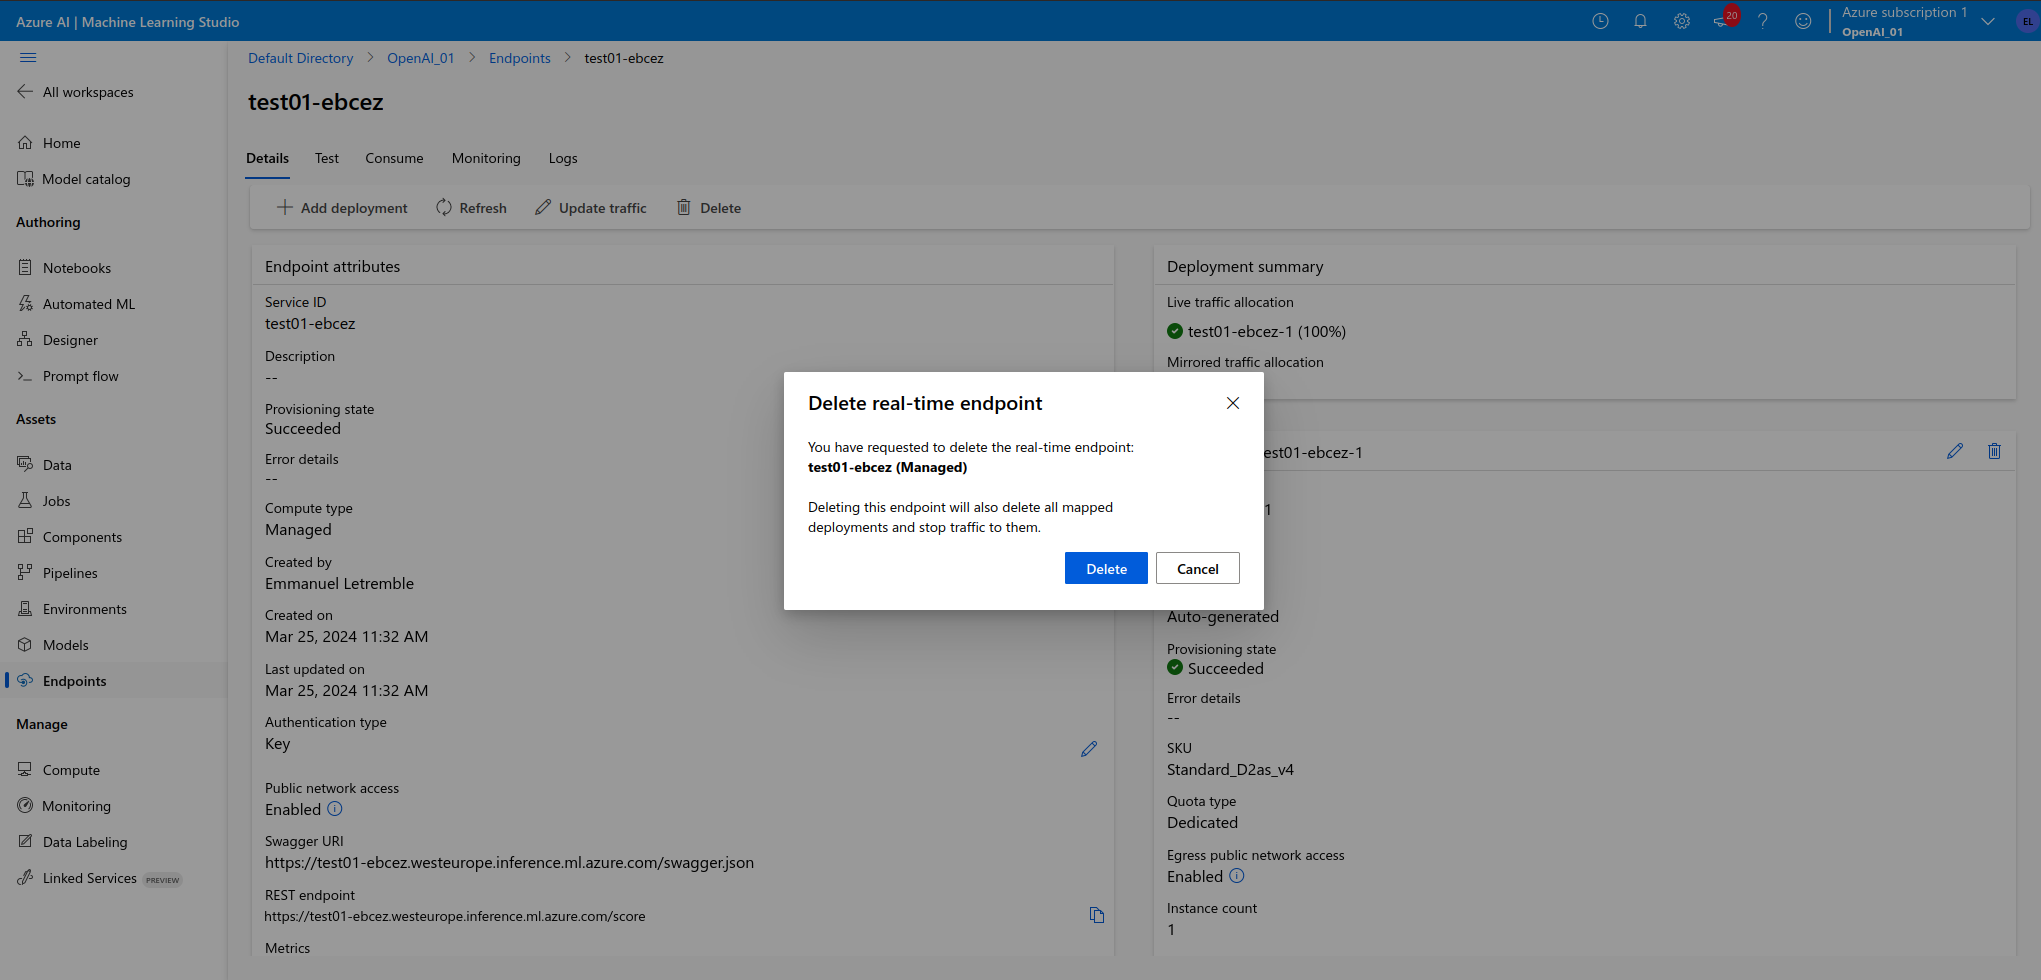
- In the studio, in the left navigation area, select Endpoint
- In the top tabs, select Details then Delete
- Confirm the deletion
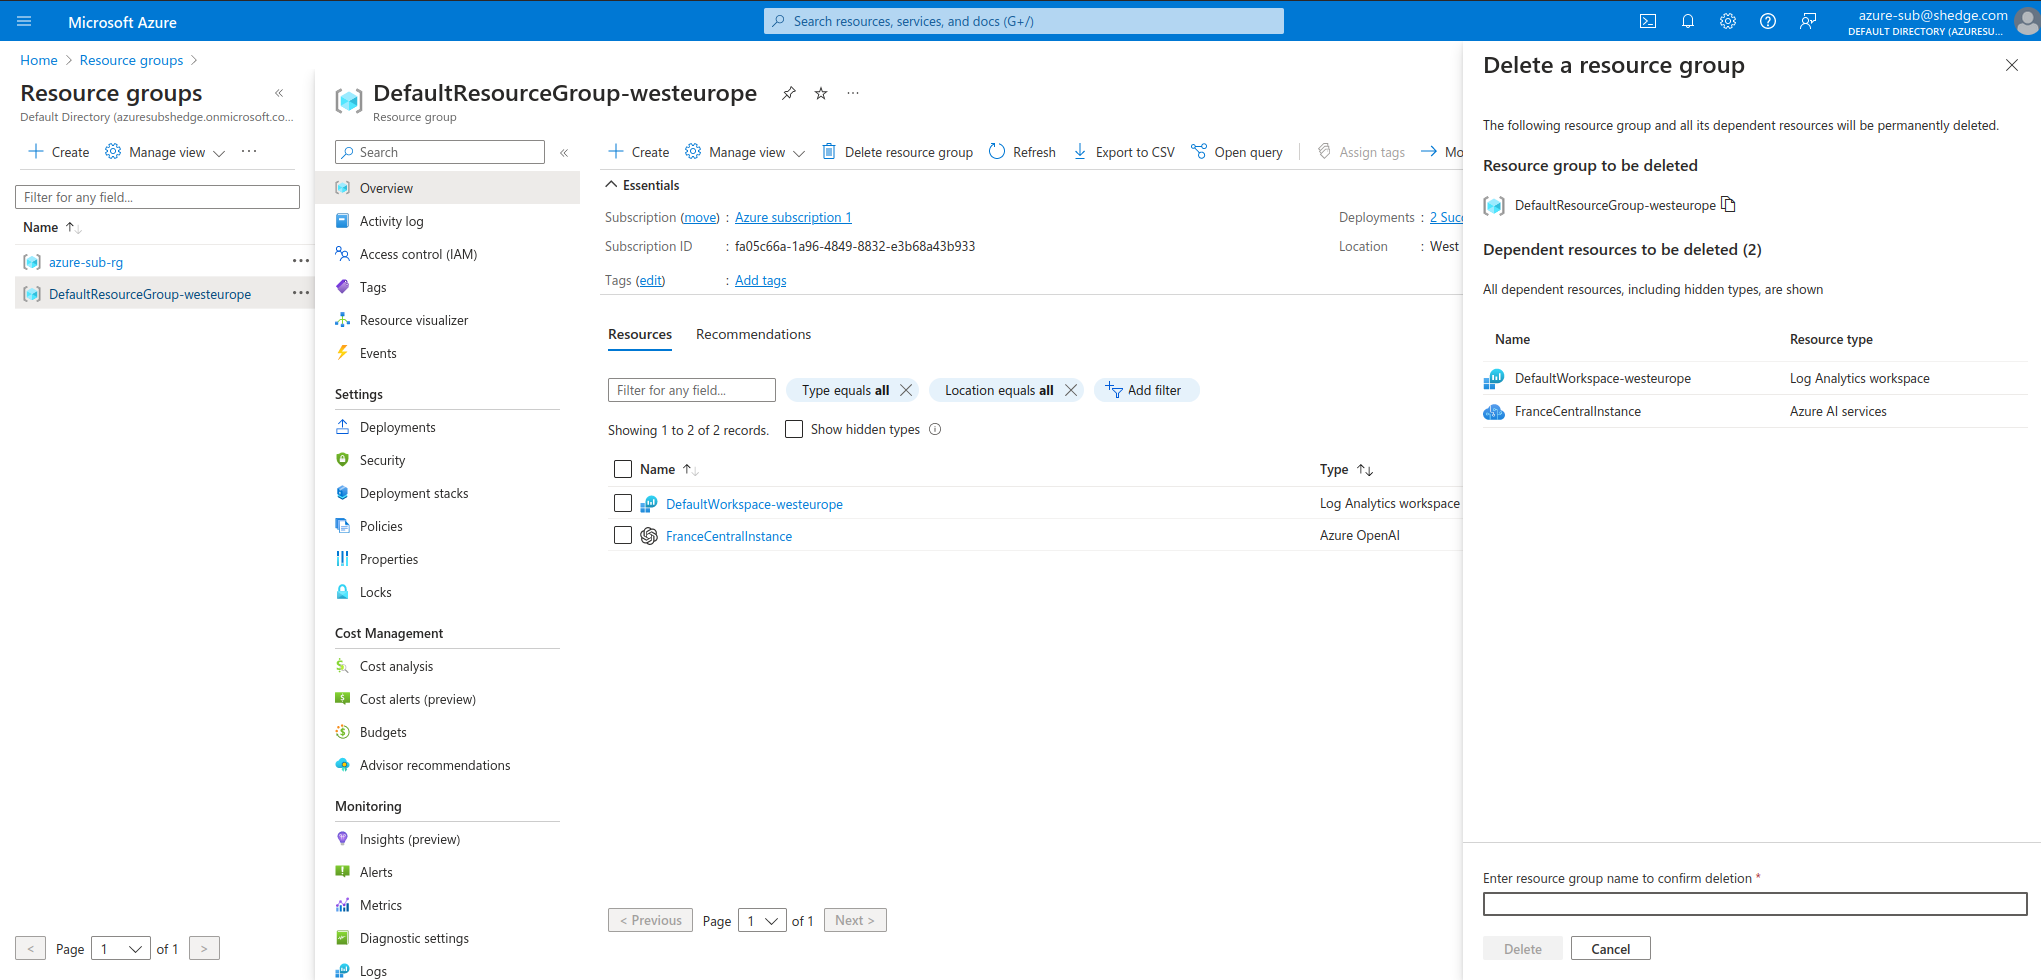
Delete all resources
If you don't plan to use any of the resources that you created, delete them so you don't incur any charges:
- In the Azure portal, select Resource groups
- From the list, select the resource group that you created.
- Select Delete resource group.